Unlock Culinary Delights: Why Make Paneer at Home?
There’s a certain magic in creating delicious food from scratch, and when it comes to Indian cuisine, mastering diy how to make paneer at home is a game-changer. Paneer, India's beloved fresh cheese, is a cornerstone of countless vegetarian dishes. While readily available in stores, homemade paneer offers an unparalleled softness, freshness, and delicate milky flavor that elevates any meal. If you've ever wondered how to achieve that perfectly tender, creamy texture in your Palak Paneer or Butter Paneer Masala, the secret lies in making it yourself.
Homemade paneer isn't just about superior taste; it's also incredibly healthy, packed with protein, and free from the preservatives often found in commercial varieties. This guide will walk you through an easy, step-by-step process to create your own batch of soft Indian cheese, ensuring you never look back at store-bought options again. Get ready to transform simple milk into a culinary delight!
Essential Ingredients for Your Homemade Paneer Journey
The beauty of paneer lies in its simplicity. You only need two core ingredients to embark on your diy how to make paneer at home adventure:
- Whole Fat Milk: 1 litre is a good starting point. The fat content is crucial for creamy, soft paneer. While you can use lower-fat milk, the yield will be less, and the texture might be firmer or more crumbly. For truly decadent paneer, don't skimp on the full-fat goodness!
- Acidic Coagulant:
- Fresh Lime Juice: 2 to 3 tablespoons. This is my preferred choice for a clean flavor profile.
- White Vinegar: 1 ½ tablespoons. A reliable alternative if lime juice isn't handy.
- Citric Acid (Optional): A pinch dissolved in water can also work, often yielding very firm paneer.
Step-by-Step Guide: Crafting Your Own Soft Paneer
Follow these detailed instructions to create beautifully soft and fresh homemade paneer.
1. Preparing the Milk
- Take your 1 litre of whole fat milk and pour it into a heavy-bottomed pan. A heavy bottom prevents scorching, which can affect the taste and color of your paneer.
- Place the pan over medium-high heat. Begin stirring the milk gently but continuously. This prevents a skin from forming on top and ensures even heating.
- Continue stirring until the milk comes to a full, rolling boil.
2. Curdling the Milk
- Once the milk reaches a boil, reduce the heat to low.
- Now, it's time to add your chosen coagulant. If using lime juice, squeeze it fresh. If using vinegar, measure it out.
- Add the lime juice or vinegar a teaspoon at a time. After each addition, gently stir the milk.
- You will observe the milk starting to curdle – solid milk particles will begin to separate from a clear, yellowish-green liquid (this is the whey).
- Keep adding the acid, one teaspoon at a time, and stirring, until the milk curdles completely. You should see a clear distinction between the milky solids and the translucent whey. If the whey still looks cloudy or whitish, add a little more acid and stir.
- Once fully curdled, turn off the heat and let the mixture sit undisturbed for 5 minutes. This allows the curds to firm up slightly before straining.
3. Straining the Curds
- Set up your straining station: Place a colander or strainer in a larger bowl (to catch the whey). Line the colander with a thick muslin cloth, cheesecloth, or even a clean, thin cotton kitchen towel.
- Carefully pour the entire contents of the pan – curds and whey – over the lined strainer. The whey will drain into the bowl below, leaving the curds in the cloth.
- Rinse the strained paneer thoroughly under cool, running water for about 1-2 minutes. This crucial step removes any residual acidic taste from the lime juice or vinegar, ensuring your paneer has a clean, milky flavor. It also helps cool down the curds.
4. Pressing for Perfection
- Gather the edges of the muslin cloth around the paneer curds, forming a neat bundle. Gently squeeze out any immediate excess water.
- To achieve that firm, sliceable paneer block, you need to press it. There are a few effective methods:
- Hanging Method: For slightly softer, less dense paneer, you can tie a knot with the cloth and hang it over your sink for 20-30 minutes to let gravity do the work. This is excellent for a more crumbly texture.
- Weighted Press Method (Recommended for Blocks):
- Fold the cloth containing the paneer into a compact rectangular or square block, much like folding a handkerchief. Aim for an even thickness.
- Place this paneer bundle on a flat surface. A plate with holes or a wire rack set over a tray works well to allow continuous drainage.
- Place a heavy, flat object on top of the paneer. This could be a cutting board with a few cans, a heavy dictionary, or even a pressure cooker filled with water. The heavier the weight and the longer the pressing time, the firmer your paneer will be.
- Allow the paneer to press for a minimum of 3-4 hours for a soft yet firm block. For a very firm, dense paneer, you can press it for up to 6 hours or even overnight. Remember, Homemade Paneer vs. Store-Bought: Achieve Superior Softness often comes down to this crucial pressing stage!
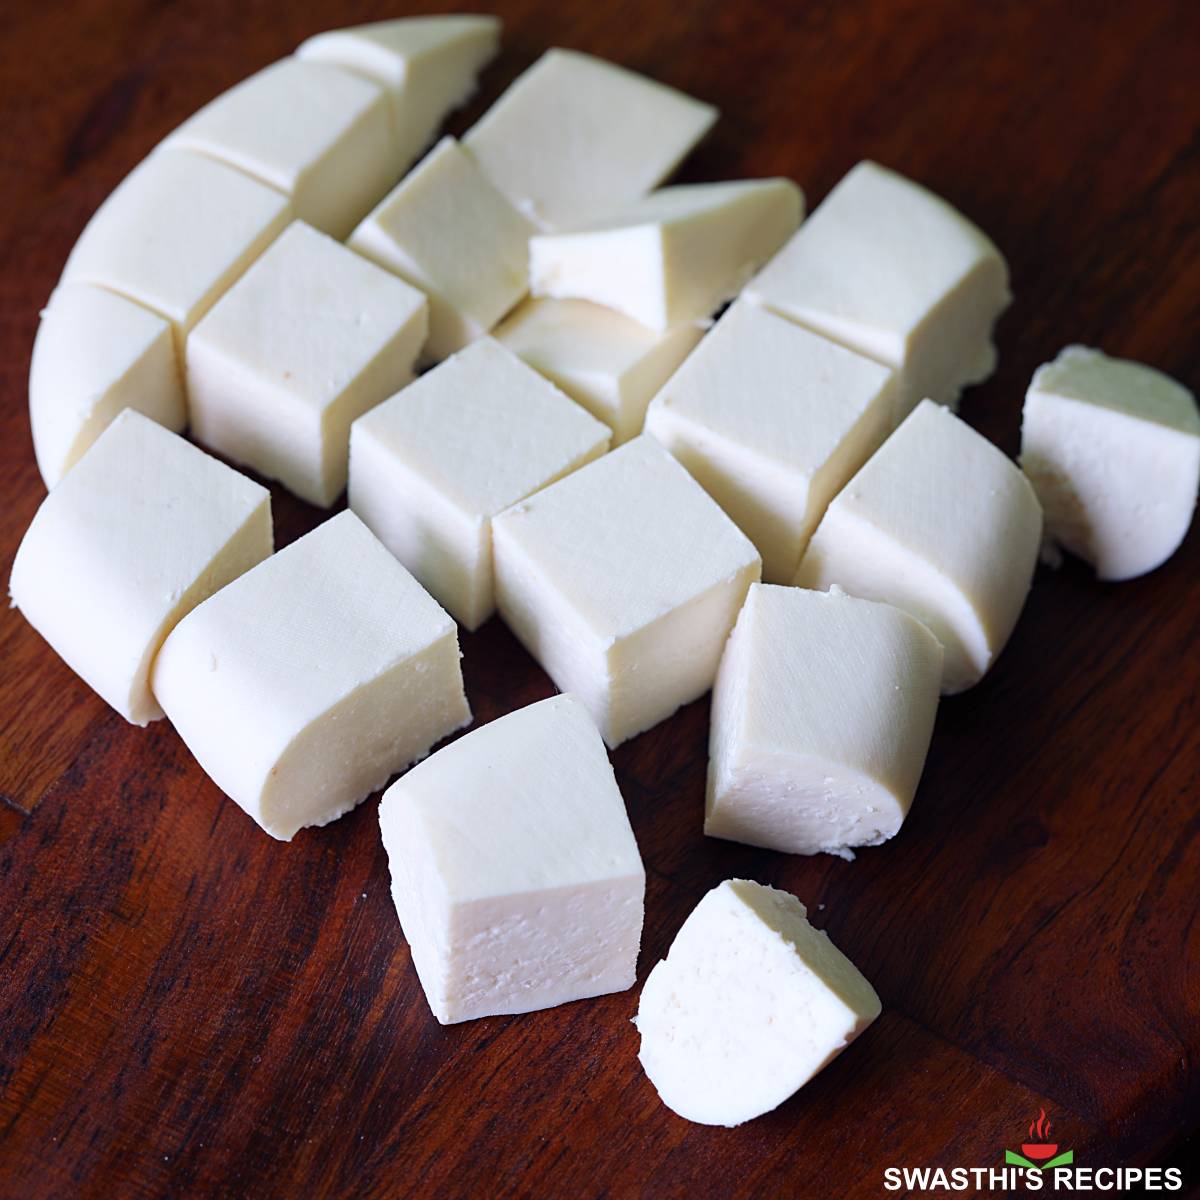
Once pressed, carefully unwrap your beautiful, homemade paneer. You might notice the edges are slightly uneven or crumbly; this is normal. Simply trim them if you desire perfectly uniform cubes. Your fresh, soft Indian cheese is now ready to be cut into cubes or crumbled and incorporated into your favorite dishes!
Tips for Perfect Homemade Paneer Every Time
- Don't Overcook the Curds: Once the milk has clearly separated into solids and whey, turn off the heat. Continuing to cook the curds can make your paneer tough and rubbery.
- Rinse, Rinse, Rinse: Thorough rinsing is non-negotiable. It washes away the acidic flavor from the coagulant, leaving you with pure milky goodness.
- Control the Firmness: The duration and weight of your pressing stage directly impact the texture. For super soft paneer, press for a shorter time with less weight. For firm, frying-friendly cubes, opt for longer pressing with a heavier weight. This is a key aspect of any DIY Paneer Guide: From Milk to Perfect Soft Indian Cheese Cubes.
- Troubleshooting Crumbly Paneer: If your paneer crumbles easily when cut, it usually means it wasn't pressed long enough or with sufficient weight, or perhaps too much water was left in. Next time, try pressing for a longer duration.
- What to do with Whey? Don't throw it away! Whey is packed with nutrients. Use it in kneading dough for rotis or bread, add it to soups, smoothies, or even water your plants with it.
Storing Your Fresh Homemade Paneer
Your freshly made paneer will stay wonderfully fresh and soft if stored correctly:
- Refrigerator: Place the paneer in an airtight container, submerged in clean, fresh water. Change the water daily. It will last for 2-3 days this way.
- Freezer: For longer storage, pat the paneer dry, cut it into desired cubes, and place it in a freezer-safe bag or container. It can be stored for 1-2 months. Thaw it in the refrigerator overnight before use, or soak it in warm water for a quick thaw, and then use it immediately.
Creative Ways to Use Your Homemade Paneer
Now that you've mastered diy how to make paneer at home, the culinary possibilities are endless! Its mild, milky flavor makes it incredibly versatile. Here are just a few ideas:
- Classic Curries: The most popular use! Think rich and creamy Butter Paneer Masala, vibrant Palak Paneer, spicy Kadai Paneer, or the regal Shahi Paneer.
- Appetizers: Cube and marinate for Paneer Tikka, crumble and stuff into samosas, or pan-fry with spices for a quick snack.
- Stir-fries and Salads: Add protein and texture to vegetable stir-fries or fresh green salads.
- Desserts: Yes, paneer can be sweet! It's the base for traditional Indian sweets like Rasgulla, Rasmalai, or Sandesh.
- Scrambles: Crumble and sauté with onions, tomatoes, and spices for a quick breakfast or light meal (Paneer Bhurji).
Conclusion: The Reward of Homemade Goodness
Making paneer at home is not just a cooking task; it's an incredibly rewarding experience that connects you more deeply with your food. The superior taste, texture, and freshness of homemade paneer are undeniable, making it well worth the small effort. By following this comprehensive guide on diy how to make paneer at home, you now have the knowledge and confidence to create this versatile Indian cheese whenever you desire. So, go ahead, gather your ingredients, and prepare to impress yourself and your loved ones with the simple joy of fresh, soft, homemade paneer!
